
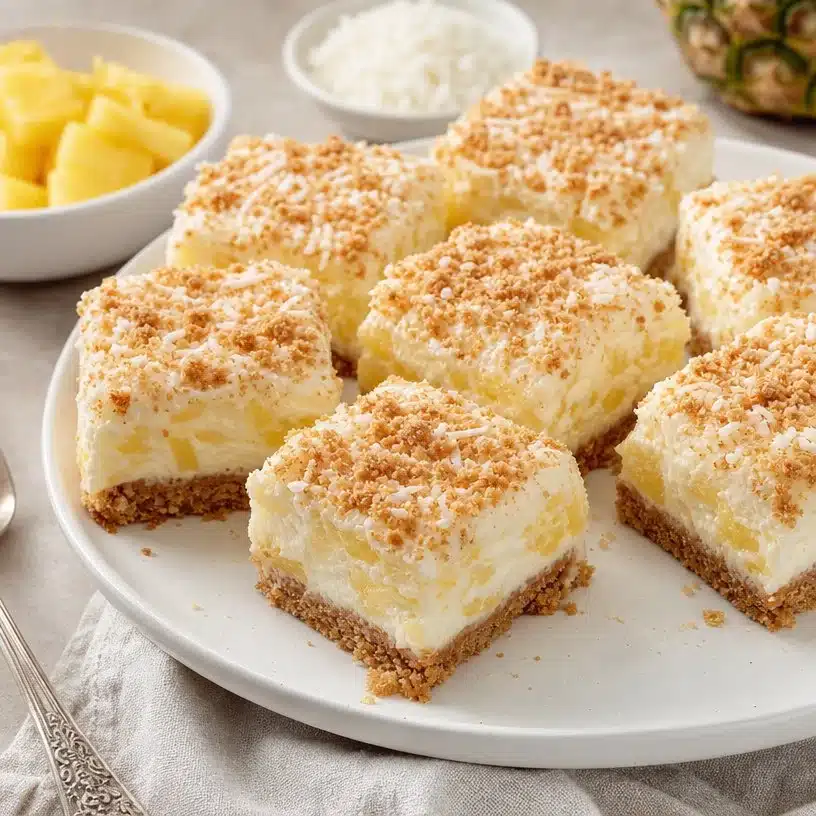
Discover the Sweet Joy of Pineapple Bliss Bars
Are you looking for a delightful treat that combines tropical flavors with a creamy texture? Look no further than Pineapple Bliss Bars! These bars are a delightful blend of crushed graham crackers, refreshing pineapple, and velvety cream cheese, creating a dessert that feels like a mini-vacation with every bite. Whether you’re preparing for a summertime picnic, a family gathering, or just wanting to indulge in something sweet, this recipe is sure to satisfy your cravings and warm your heart.
Let’s dive into why these Pineapple Bliss Bars are the perfect dessert for any occasion and how easy it is to whip them up in your own kitchen!
Why You’ll Love Pineapple Bliss Bars
There are plenty of reasons to love these Pineapple Bliss Bars! First and foremost, they are incredibly simple to make, requiring minimal ingredients and no baking. Yes, you heard that right—no oven required! Just mix, chill, and enjoy.
Another reason to try these blissful bars is their refreshing flavor profile. The sweetness of crushed pineapple combined with creamy, whipped topping and a hint of coconut creates a tropical escape that is perfect for hot summer days or when you just need a little pick-me-up. Plus, each bite gives you a satisfying crunch thanks to the graham cracker crust, balancing the silky filling beautifully.
Finally, these bars are also customizable! They are versatile enough to allow for various tweaks and adjustments to fit your personal taste or dietary needs. Whether you want to switch up the toppings or try adding in your favorite fruits, the possibilities are endless.
Step-by-Step: Making Pineapple Bliss Bars
Making Pineapple Bliss Bars is a hassle-free process that even beginner bakers can master. Follow these easy steps, and soon you’ll be enjoying your delicious creation!
Ingredients:
- 2 cups crushed graham crackers
- 1/2 cup unsweetened shredded coconut
- 1/2 cup butter, melted
- 1 cup powdered sugar
- 8 oz cream cheese, softened
- 1 can (20 oz) crushed pineapple, drained
- 1 cup whipped topping
Directions:
- Prepare the Crust: Start off by combining the crushed graham crackers, shredded coconut, and melted butter in a bowl. Once everything is well mixed, press the mixture firmly into the bottom of a greased 9×9 inch pan to form a crust that holds everything together.
- Make the Filling: In a separate bowl, beat together the softened cream cheese and powdered sugar until the mixture is smooth and creamy. This will be the base of your delicious filling!
- Combine Pineapple and Topping: Now, it’s time to fold in the good stuff! Gently stir in the drained crushed pineapple and whipped topping until everything is well combined and fluffy. You want to ensure that the pineapple is evenly distributed for maximum flavor.
- Assemble the Bars: Spread the pineapple mixture evenly over the crust in the pan. Don’t skip this step—this is where the fun begins!
- Chill to Set: Cover the pan with plastic wrap or foil and refrigerate for at least 2 hours. This step is crucial since it allows the dessert to firm up nicely.
- Cut and Serve: Once set, take the pan out of the fridge, cut the bars into squares, and serve chilled. Enjoy the sweet, tropical goodness!
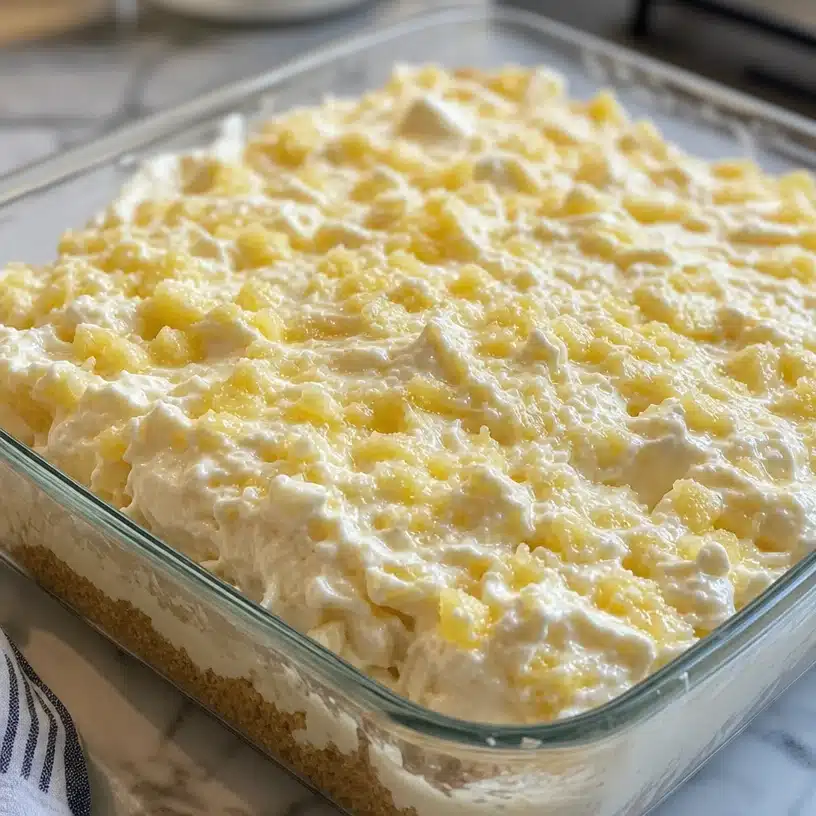
Best Ways to Serve Pineapple Bliss Bars
When it comes to serving Pineapple Bliss Bars, presentation matters! Consider placing them on a beautiful serving platter, sprinkling a few extra coconut flakes on top as a garnish. You can also drizzle some melted chocolate or a fruit sauce over the bars for an elegant touch.
These bars pair wonderfully with a fresh fruit salad or a scoop of vanilla ice cream on the side, elevating the dessert experience to new heights. If you’re hosting a get-together, serve them alongside other delightful treats, such as Apple Crumb Bars to create a dessert table that your guests won’t forget.
Storage Tips for Pineapple Bliss Bars
Storing your Pineapple Bliss Bars is easy! Simply keep them in an airtight container in the refrigerator. They will stay fresh for about 3 to 5 days, allowing you to enjoy them throughout the week.
If you want to prepare them in advance, you can make the bars a day or two before your event. Just ensure they are tightly covered to prevent them from absorbing any unwanted odors from the fridge. For long-term storage, you can also freeze the bars. Just slice them, wrap each piece tightly in plastic wrap, and place them in a freezer-safe container. When you’re ready to enjoy them, simply thaw them in the refrigerator for a couple of hours.
Expert Tips for Perfect Pineapple Bliss Bars
- Use Fresh Ingredients: The quality of the cream cheese and pineapple can greatly influence the flavor of your bars, so use fresh, high-quality products for the best results.
- Draining the Pineapple: Make sure to drain the crushed pineapple well to avoid a soggy filling. You can also use a paper towel to soak up any excess moisture.
- Experiment with Flavors: Don’t be afraid to play around with the ingredients. You can add in some lime or lemon zest for an extra zing or even use flavored whipped topping for a twist!
- Layering: For a more decadent dessert, consider adding layers. Start with a thin layer of crust, then a layer of filling, and repeat until you run out of ingredients!
Creative Twists on Pineapple Bliss Bars
While the original recipe is already a heavenly treat, you can also add your own twist. For example, consider adding a layer of chocolate ganache on top for an indulgently rich flavor. Or swap out the shredded coconut for finely chopped nuts for added texture.
If you’re feeling adventurous, try adding layers of other fruits like strawberries or kiwis for a fruit parfait-style experience. These variations can take your dessert from great to extraordinary, perfect for impressing guests at your next gathering.
FAQs
Can I make Pineapple Bliss Bars gluten-free?
Yes! Just replace the graham crackers with gluten-free alternatives. There are many gluten-free graham cracker versions available in stores.
Can I use fresh pineapple instead of canned?
Absolutely! Just ensure that the fresh pineapple is properly chopped and drained to maintain the texture of the filling.
How long do Pineapple Bliss Bars need to chill?
For best results, let them chill for at least 2 hours. This allows the filling to set up properly, making for a firmer texture when you cut them.
So what are you waiting for? Give these Pineapple Bliss Bars a try and let your taste buds bask in the tropical delight! Happy baking!
Print
Pineapple Bliss Bars
- Prep Time: 15 minutes
- Cook Time: 0 minutes
- Total Time: 135 minutes
- Yield: 12 servings
- Category: Dessert
- Method: Chilling
- Cuisine: American
- Diet: Vegetarian
Description
A delightful treat combining tropical flavors with a creamy texture, perfect for summer gatherings or a sweet indulgence.
Ingredients
- 2 cups crushed graham crackers
- 1/2 cup unsweetened shredded coconut
- 1/2 cup butter, melted
- 1 cup powdered sugar
- 8 oz cream cheese, softened
- 1 can (20 oz) crushed pineapple, drained
- 1 cup whipped topping
Instructions
- Prepare the crust: Combine the crushed graham crackers, shredded coconut, and melted butter in a bowl. Press firmly into a greased 9×9 inch pan.
- Make the filling: Beat the softened cream cheese and powdered sugar together until smooth and creamy.
- Combine pineapple and topping: Fold in the drained crushed pineapple and whipped topping until well combined and fluffy.
- Assemble the bars: Spread the pineapple mixture evenly over the crust in the pan.
- Chill to set: Cover with plastic wrap and refrigerate for at least 120 minutes.
- Cut and serve: Once set, cut the bars into squares and serve chilled.
Notes
For best results, drain the pineapple well and use high-quality ingredients.