
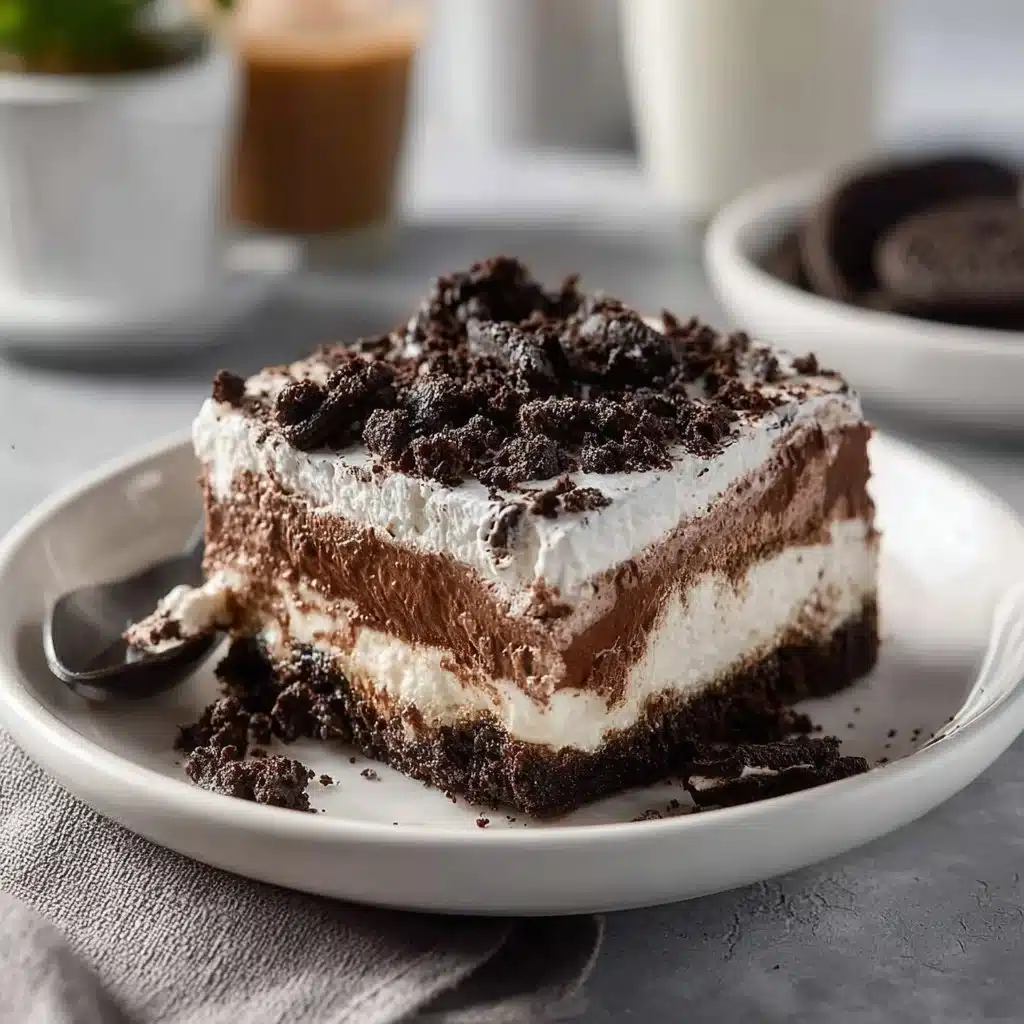
It’s time to treat yourself to a heavenly dessert that’s sure to win over hearts (and taste buds)! If you’re on the hunt for something decadent yet surprisingly easy to whip up, let me introduce you to the Layered No-Bake Oreo Dessert. This delightful creation is a sweet escape made with crushed Oreos, luscious cream, and rich chocolate pudding, layered to perfection. Trust me, you won’t be able to resist this one!
Why This Recipe Is Worth Making
Why will you love this Layered No-Bake Oreo Dessert? First off, it’s a no-bake wonder, making it perfect for those lazy summer days or any occasion when you want to spend more time enjoying company rather than sweating over a hot oven. Plus, you get the delightful crunch of Oreo cookies paired with creamy fillings, what’s not to love?
This dessert gets better: it caters to all occasions. Birthdays, holidays, casual get-togethers, you name it, this layered delight fits right in. And with minimal ingredients that you likely already have at home, there’s almost no excuse not to make it!
Let’s talk texture! The contrast of the crumbly Oreo base, the velvety cream cheese filling, the luscious chocolate pudding, and the fluffy whipped cream combine to create an irresistible dessert that speaks to your senses. Each bite delivers a symphony of flavors and textures that keep you coming back for more.
Easy Instructions for Layered No-Bake Oreo Dessert
Ready to create your new favorite dessert? Follow these straightforward steps to achieve the perfect Layered No-Bake Oreo Dessert that will have everyone raving!
Ingredients
- 24 Oreo cookies
- 8 oz cream cheese, softened
- 1 cup powdered sugar
- 1 box (3.9 oz) chocolate pudding mix
- 2 cups milk
- 8 oz whipped cream
Directions
- Create the Oreo Crust: Start by crushing the Oreo cookies into fine crumbs. You can do this by placing them in a zip-top bag and rolling them with a rolling pin or using a food processor. Once crushed, press these crumbs into the bottom of your dish to form a solid crust.
- Make the Cream Cheese Layer: In a medium bowl, beat the softened cream cheese and powdered sugar together until the mixture is smooth and creamy. This adds a delightful tanginess and sweetness to balance the chocolate layers.
- Prepare the Chocolate Pudding: Follow the instructions on the chocolate pudding box, whisking it with the milk until it thickens. Who doesn’t love a rich chocolate flavor?
- Assemble the Layers: Spread your cream cheese mixture evenly over the Oreo crust. Then, pour the chocolate pudding layer over the cream cheese.
- Finish with Whipped Cream: Top it all off with a generous layer of whipped cream to bring a light, airy finish to the dessert.
- Chill and Set: Refrigerate for a few hours (or even overnight) to allow the dessert to set properly. This is where the magic happens as the flavors meld together.
Best Ways to Serve Layered No-Bake Oreo Dessert
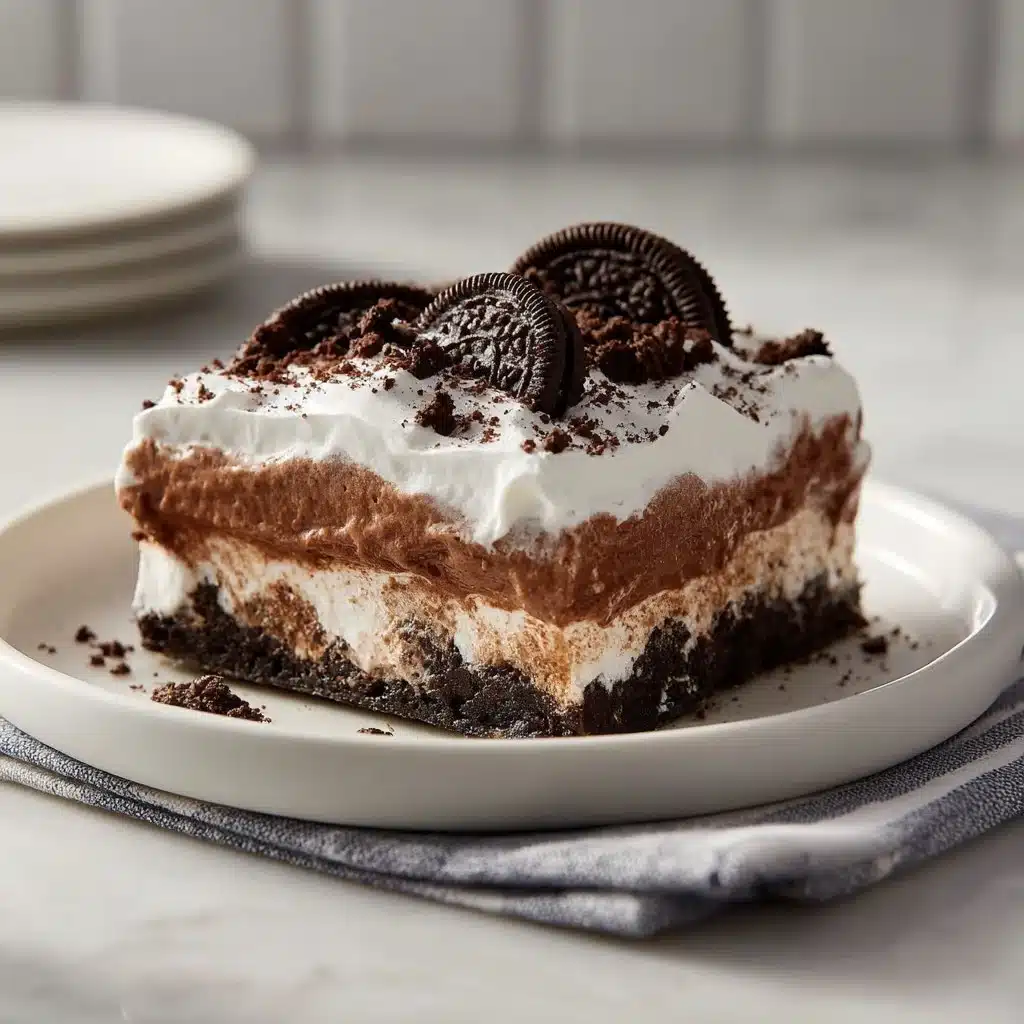
When it comes to serving your Layered No-Bake Oreo Dessert, presentation is key! Consider using individual serving cups or bowls for a fun spin. This makes them easy to grab and enjoy, and everyone gets their own portion. You can also garnish each serving with crumbled Oreos or a drizzle of chocolate syrup for that extra touch.
If you’re feeling fancy, add fresh berries on top for a pop of color and a bit of freshness. A sprig of mint can also add a wonderful contrast to the chocolate flavors! Serve with a side of coffee or a scoop of vanilla ice cream for a delightful contrast that complements the rich dessert.
Storage Tips for Layered No-Bake Oreo Dessert
Leftover dessert? No worries! To keep your Layered No-Bake Oreo Dessert fresh, cover it tightly with plastic wrap or keep it in an airtight container. It can be stored in the refrigerator for up to three days. Just a heads up, though: the longer it sits, the softer the Oreo crust can get, so try to enjoy it while it’s fresh for the best experience!
Pro Tips for Making Layered No-Bake Oreo Dessert
- Use Room Temperature Ingredients: Always make sure the cream cheese is softened to room temperature to avoid lumps.
- Whip It Good: Ensure the whipped cream is whipped to stiff peaks. This will give your dessert that airy texture you’re aiming for.
- Chill Time Is Key: Don’t rush the chilling process! Letting it sit allows the layers to meld together beautifully and enhances the overall flavor.
Delicious Variations of Layered No-Bake Oreo Dessert
Feel like switching up this classic recipe? Here are some fun variations to inspire you:
- Minty Fresh: Add a few drops of peppermint extract to the cream cheese layer for a mint chocolate twist. It’s perfect for holiday gatherings!
- Peanut Butter Bliss: Swirl in some creamy peanut butter into the cream cheese layer for that classic chocolate-peanut butter combo.
- Berry Delight: Swap out the chocolate pudding for vanilla and layer fresh strawberries or raspberries in between!
FAQs
1. Can I use different types of cookies?
Absolutely! While Oreos are a classic choice, feel free to use any sandwich cookie you love, like chocolate chip cookies or even gluten-free options.
2. How long does the dessert need to set?
Ideally, letting it chill for at least 4 hours or even overnight will give it the best flavor and texture!
3. Can I make this dessert ahead of time?
Yes! This dessert is great made ahead, making it the perfect option for parties or gatherings. Just store it properly in the fridge, and it’ll be ready to serve when you are.
Say hello to your new go-to dessert! This Layered No-Bake Oreo Dessert not only satisfies your sweet cravings but also brings a sense of comfort and joy that resonates with what baking is all about. So, roll up your sleeves, gather the ingredients, and let’s create some magic! You’ve got this, and I can’t wait to hear how your dessert turned out!
Print
Layered No-Bake Oreo Dessert
- Prep Time: 15 minutes
- Cook Time: 0 minutes
- Total Time: 240 minutes
- Yield: 8 servings
- Category: Dessert
- Method: No-Bake
- Cuisine: American
- Diet: Vegetarian
Description
A heavenly no-bake dessert with layers of crushed Oreos, cream cheese, chocolate pudding, and whipped cream, perfect for any occasion.
Ingredients
- 24 Oreo cookies
- 8 oz cream cheese, softened
- 1 cup powdered sugar
- 1 box (3.9 oz) chocolate pudding mix
- 2 cups milk
- 8 oz whipped cream
Instructions
- Crush the Oreo cookies into fine crumbs and press into the bottom of a dish to form a crust.
- In a medium bowl, beat cream cheese and powdered sugar until smooth and creamy.
- Prepare chocolate pudding by whisking the mix with milk until it thickens.
- Spread the cream cheese mixture over the crust, then pour the chocolate pudding layer on top.
- Top with whipped cream and refrigerate for a few hours or overnight to set.
Notes
For best results, use room temperature cream cheese and ensure whipped cream is whipped to stiff peaks. Chill overnight for ideal flavor.
2 thoughts on “Indulge in Bliss: Layered No-Bake Oreo Dessert Recipe”