
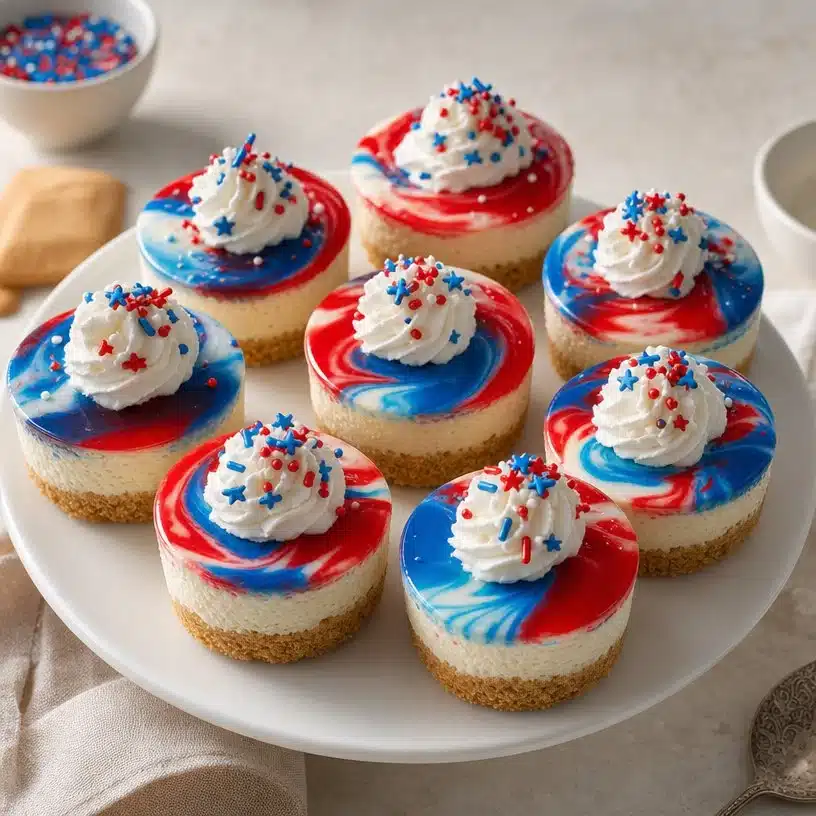
Delightful Red, White and Blue Mini Cheesecakes
Welcome to your new favorite dessert recipe: Red, White, and Blue Mini Cheesecakes! If you’re looking for a delightful treat that’s perfect for holidays, picnics, or just a sweet evening at home, you’ve stumbled upon a true gem. These mini cheesecakes are not only visually stunning but also deliciously rich and creamy, making them the ideal way to celebrate festive occasions or simply to enjoy with friends and family. Plus, they’re a fantastic option if you’re looking for a unique dessert to impress your guests.
Why This Recipe Is Worth Making
Beyond being visually appealing, these Red, White, and Blue Mini Cheesecakes are incredibly easy to make. Each bite is a balanced combination of creamy cheesecake, a buttery crust, and vibrant colors, making them pop on any dessert table. With the addition of colorful layers, they capture the spirit of celebration and joy. If you already love cheesecake, then you’re surely going to adore this playful, festive twist. Plus, if you want to explore other delicious mini desserts, you might want to check out this healthy mini lemon blueberry cheesecake recipe for an exciting alternative!
How to Prepare Red, White, and Blue Mini Cheesecakes
Making mini cheesecakes might seem a bit daunting at first, but it’s definitely a fool-proof process that anyone can follow. Let’s break it down step by step, so you can create these delightful desserts in no time.
Ingredients
- 1 cup (134g) vanilla wafer cookie crumbs
- 2 tbsp (26g) sugar
- 4 tbsp (56g) butter, melted
- 12 ounces (339g) cream cheese, room temperature
- 1/2 cup (104g) sugar
- 3 tbsp (24g) flour
- 1/2 cup (115g) sour cream
- 1 1/2 tsp vanilla extract
- 2 eggs
- Blue gel icing color
- Red gel icing color
- 1/2 cup (120ml) heavy whipping cream, cold
- 5 tbsp (36g) powdered sugar
- 1/2 tsp vanilla extract
- Sprinkles for decoration
Directions
- Preheat your oven to 325°F (162°C) and line a cupcake pan with cupcake liners.
- In a bowl, combine the vanilla wafer cookie crumbs, 2 tablespoons of sugar, and melted butter until well mixed. Divide this mixture evenly between the cupcake liners, pressing it firmly into the bottoms.
- Bake the crusts for about 5 minutes, then allow them to cool in the pan.
- Once the crusts are cool, reduce the oven temperature to 300°F (148°C). In a large mixing bowl, beat the cream cheese, 1/2 cup sugar, and flour together until smooth and well combined.
- Add in the sour cream and 1 1/2 teaspoons of vanilla extract, mixing on low speed until fully incorporated.
- Incorporate the eggs one at a time, mixing slowly to ensure a smooth batter.
- Divide the batter into three separate bowls. Leave one bowl plain, then color one bowl red using the red gel icing color and the other blue with blue gel icing color.
- Layer the colored batter into the cooled crusts beginning with the plain white layer, followed by the red, and then the blue, filling each cup almost to the top.
- Bake for 18 to 20 minutes, then turn off the oven, keeping the door closed for an additional 10 minutes to let the mini cheesecakes set.
- Allow them to cool for about 15 to 20 minutes inside the oven, then transfer them to the fridge to cool completely.
- For the whipped cream topping, combine the cold heavy whipping cream, powdered sugar, and 1/2 teaspoon of vanilla extract in a mixing bowl. Whip until stiff peaks form.
- Lastly, pipe the whipped cream on top of each mini cheesecake and finish with colorful sprinkles.
- Refrigerate until ready to serve, and they are at their best enjoyed within 2 to 3 days.
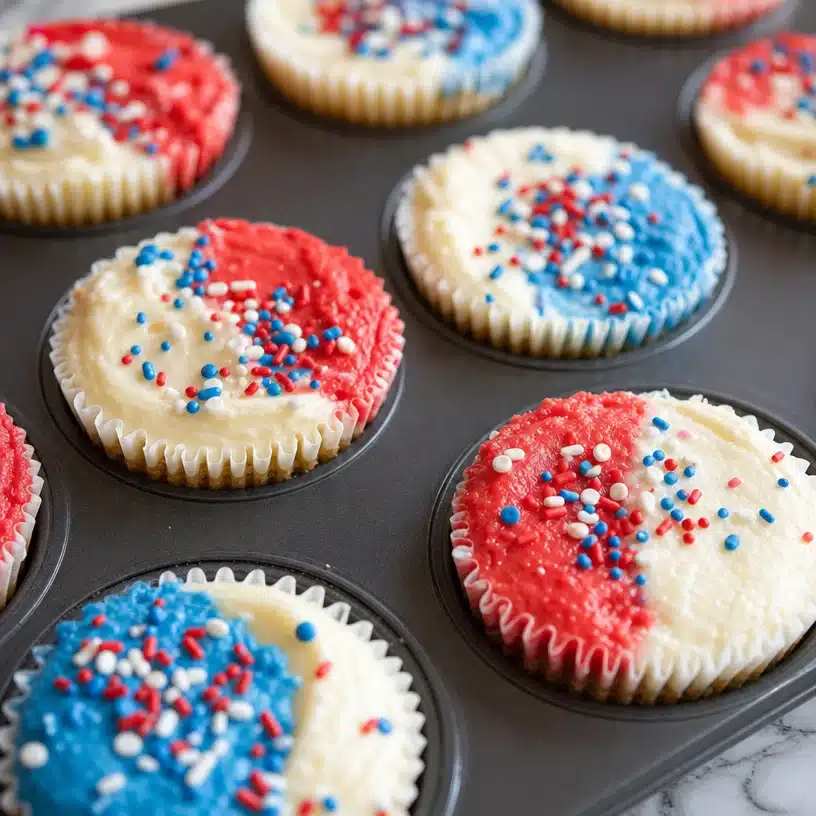
Best Ways to Serve Red, White, and Blue Mini Cheesecakes
These mini cheesecakes are as delightful to serve as they are to eat. Imagine a platter full of vibrant, colorful cheesecakes at your next gathering! You can offer them as individual servings which makes it easy for guests to pick their favorite. Pair them with fresh berries or a light fruit sauce for additional flavor and a refreshing touch. They also work beautifully alongside a cup of coffee or even iced tea, making the experience feel extra special.
How to Store Leftover Mini Cheesecakes
Keeping your Red, White, and Blue Mini Cheesecakes fresh is simple. Store any leftovers in an airtight container in the refrigerator, where they can stay fresh for up to 2 to 3 days. If you want to make them ahead of time, you can prepare them and freeze before the whipped cream topping. To enjoy, just thaw them in the fridge overnight before finishing with whipped cream.
Pro Tips for Making Mini Cheesecakes
- For an even creamier texture, ensure your cream cheese is at room temperature before you start mixing. This will help prevent clumps and ensure a smooth consistency.
- Use a cookie scoop or spoon to layer the colored batter evenly. This helps maintain the distinct layers and gives each cheesecake that beautiful appearance.
- Experiment with the colors to make your mini cheesecakes festive for any occasion: orange and black for Halloween, or green and red for Christmas!
Creative Twists on Mini Cheesecakes
Feel free to get creative with this recipe! If you want to add an extra layer of flavor, you can swirl in fresh fruit purees into the cheesecake batter before baking. You can also swap out the vanilla wafer crumbs for crushed graham crackers or even chocolate cookies for a different flavor base. For other delightful choices, consider making baked pears with berries and blue cheese for a gorgeous presentation at your next dinner party.
FAQs
How can I make these cheesecakes gluten-free?
You can substitute the vanilla wafer cookie crumbs with gluten-free cookies or a gluten-free graham cracker alternative.
Can I use different colors for the layers?
Absolutely! You can customize the colors to fit any theme or occasion, making them perfect for celebrations year-round.
What can I use instead of sour cream?
If you don’t have sour cream on hand, Greek yogurt can be a great substitute, providing a similar texture and flavor.
These Red, White, and Blue Mini Cheesecakes are sure to be a hit, whether for a holiday celebration or just a sweet treat to enjoy at home. Happy baking!
Print
Delightful Red, White and Blue Mini Cheesecakes
- Prep Time: 20 minutes
- Cook Time: 30 minutes
- Total Time: 50 minutes
- Yield: 12 servings
- Category: Dessert
- Method: Baking
- Cuisine: American
- Diet: Vegetarian
Description
A visually stunning and deliciously rich dessert, perfect for holidays and gatherings.
Ingredients
- 1 cup (134g) vanilla wafer cookie crumbs
- 2 tbsp (26g) sugar
- 4 tbsp (56g) butter, melted
- 12 ounces (339g) cream cheese, room temperature
- 1/2 cup (104g) sugar
- 3 tbsp (24g) flour
- 1/2 cup (115g) sour cream
- 1 1/2 tsp vanilla extract
- 2 eggs
- Blue gel icing color
- Red gel icing color
- 1/2 cup (120ml) heavy whipping cream, cold
- 5 tbsp (36g) powdered sugar
- 1/2 tsp vanilla extract
- Sprinkles for decoration
Instructions
- Preheat your oven to 325°F (162°C) and line a cupcake pan with cupcake liners.
- Combine the vanilla wafer cookie crumbs, 2 tablespoons of sugar, and melted butter until well mixed. Divide this mixture evenly between the cupcake liners, pressing it firmly into the bottoms.
- Bake the crusts for about 5 minutes, then allow them to cool in the pan.
- Reduce the oven temperature to 300°F (148°C). In a large mixing bowl, beat the cream cheese, 1/2 cup sugar, and flour together until smooth and well combined.
- Add in the sour cream and 1 1/2 teaspoons of vanilla extract, mixing on low speed until fully incorporated.
- Incorporate the eggs one at a time, mixing slowly to ensure a smooth batter.
- Divide the batter into three separate bowls. Leave one bowl plain, then color one bowl red using the red gel icing color and the other blue with blue gel icing color.
- Layer the colored batter into the cooled crusts beginning with the plain white layer, followed by the red, and then the blue, filling each cup almost to the top.
- Bake for 18 to 20 minutes, then turn off the oven, keeping the door closed for an additional 10 minutes to let the mini cheesecakes set.
- Allow them to cool for about 15 to 20 minutes inside the oven, then transfer them to the fridge to cool completely.
- Combine the cold heavy whipping cream, powdered sugar, and 1/2 teaspoon of vanilla extract in a mixing bowl. Whip until stiff peaks form.
- Pipe the whipped cream on top of each mini cheesecake and finish with colorful sprinkles.
- Refrigerate until ready to serve, and they are at their best enjoyed within 2 to 3 days.
Notes
For extra creaminess, ensure your cream cheese is at room temperature. Store leftovers in an airtight container for up to 2 to 3 days.