

Deliciously Flaky Cheese Danish: A Perfect Treat
Hey there, baking buddies! Are you ready to dive into the delightful world of pastry? If you’re anything like me, you adore a sweet treat that not only tastes fantastic but also fills the kitchen with an irresistible aroma. Today, we’re whipping up a truly scrumptious Cheese Danish that’s as flaky as a beautiful autumn leaf. Imagine biting into layers of buttery pastry complemented by a creamy, dreamy cheese filling. Sounds amazing, right? Let’s roll up our sleeves and get started!
Why You’ll Love This Deliciously Flaky Cheese Danish
There are so many reasons to love this Cheese Danish! First and foremost, it features a flaky puff pastry that practically melts in your mouth. The contrast between the crispy exterior and the creamy, sweet interior creates a delightful taste experience that you won’t forget.
This recipe is also incredibly simple, making it perfect for both novice bakers and seasoned pros. If you’re looking to impress friends or treat yourself on a lazy Sunday morning, this Cheese Danish is a showstopper! The minimal ingredients mean you can make it anytime without a hefty shopping list.
Additionally, these little pockets of joy are versatile. You can serve them for breakfast, enjoy them as an afternoon snack, or even present them as a dessert after dinner. They are bound to win over everyone in your home, from kids to your most discerning friends.
How to Make Deliciously Flaky Cheese Danish
Ready to create this treat? Let’s get into the nitty-gritty of how to make this delicious Cheese Danish.
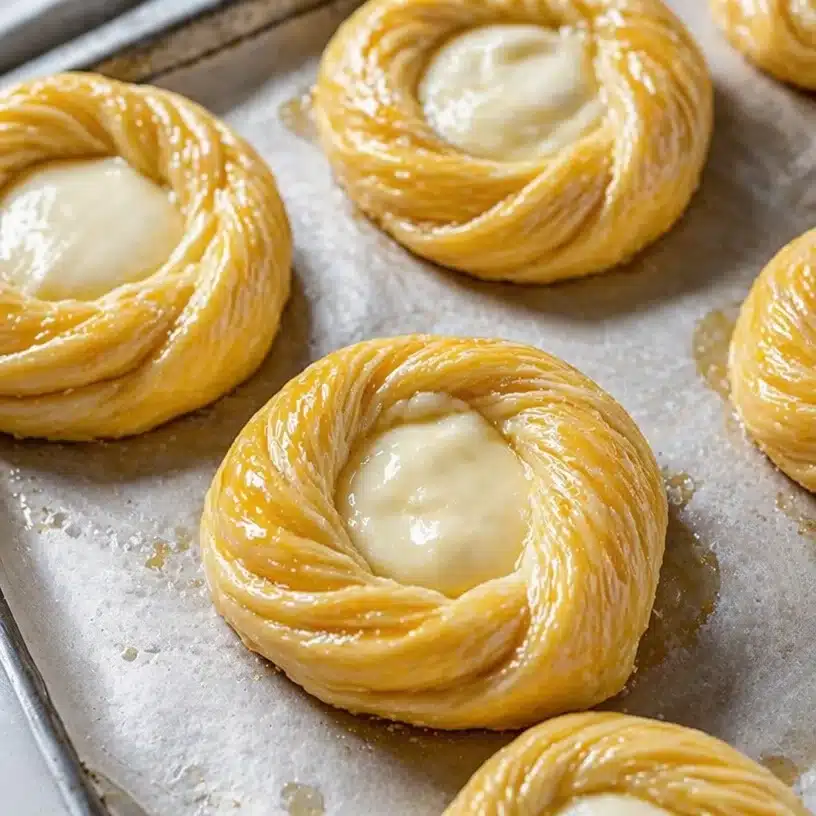
Ingredients
- 1 sheet Puff Pastry (thawed)
- 1 cup Cream Cheese (softened)
- 1/4 cup Sugar
- 1 teaspoon Vanilla Extract
- 1 egg (beaten for egg wash)
Directions
- Preheat your oven to 375°F (190°C).
- Roll out the thawed puff pastry on a lightly floured surface to about 1/8 inch thick. This helps to achieve a nice flaky texture.
- Cut the pastry into rectangular pieces, approximately 3×4 inches.
- In a mixing bowl, combine the softened cream cheese, sugar, and vanilla extract. Mix until smooth.
- Place a spoonful of the cream cheese mixture onto the center of each pastry rectangle. Don’t skimp on this filling—it’s the star of the show!
- Fold the edges of the pastry over the filling, creating a pocket. This keeps all that deliciousness contained.
- Brush with beaten egg for that beautiful golden-brown finish.
- Bake for 20-25 minutes or until golden brown. The smell wafting through your kitchen will be out of this world!
- Let them cool slightly before serving, so you don’t burn your tongue on that gooey goodness.
Best Ways to Serve Deliciously Flaky Cheese Danish
These Cheese Danishes can be served up in so many delightful ways! For a classic touch, dust some powdered sugar on top for a sophisticated look. If you want to take it up a notch, serve them with a dollop of fresh whipped cream or a smear of your favorite fruit preserves.
Pair your Cheese Danish with a hot cup of coffee for a wonderfully indulgent breakfast or afternoon treat. If you’re feeling extra fancy, consider adding a drizzle of chocolate or a sprinkle of fresh berries on the side for a pop of color and flavor.
Storage Tips for Deliciously Flaky Cheese Danish
Worried about leftovers? Don’t be! These Cheese Danishes can be stored easily. Place them in an airtight container at room temperature for up to three days. If you plan on keeping them longer, consider refrigerating them. They can last for a week in the fridge.
When it’s time to enjoy leftovers, you can reheat them in the oven at 350°F (175°C) for about 5-10 minutes. This will bring back their flakiness and warm that creamy filling, making them feel fresh and new again!
Expert Tips for Perfect Cheese Danish
- Puff Pastry is Key: Use high-quality puff pastry for the best results. It really makes a difference in the texture and flavor.
- Serve Warm: These are best served warm and fresh. The heat enhances the creamy filling and the flaky layers.
- Cream Cheese Softness: Ensure your cream cheese is well softened to prevent lumps in your filling. A smooth mix makes for a beautiful filling!
- Don’t Overstuff: Use a spoonful of the cream cheese mixture. Overstuffing can lead to messy pastries that break apart during baking.
- Experiment with Fillings: Feel free to mix it up! Adding fruits or even a bit of lemon zest can elevate the flavor profile.
Delicious Variations of Cheese Danish
Feeling adventurous? Try some of these fun variations on the classic Cheese Danish:
- Fruit-filled Danish: Add a spoonful of your favorite fruit preserves (like raspberry or apricot) on top of the cream cheese filling.
- Spiced version: Add a pinch of cinnamon or nutmeg to the cream cheese mixture for a warm, spiced flavor.
- Lemon Zest: Incorporate lemon zest into the filling for a refreshing twist.
- Nutty Delight: Mix in some chopped nuts or almond flour into the filling for an extra crunch.
FAQs
1. Can I freeze Cheese Danishes?
Yes! You can freeze unbaked Cheese Danishes. Just assemble them, place them on a baking sheet until they are firm, then store them in an airtight container or freezer bag. Bake them straight from the freezer, adding a few extra minutes to the baking time.
2. Can I use low-fat cream cheese?
Absolutely! Low-fat cream cheese can be used in this recipe, although it may not be as rich and creamy.
3. What can I use instead of vanilla extract?
If you don’t have vanilla extract, almond extract can be a great alternative, giving your Cheese Danish a different but delightful flavor.
Let’s get baking! With this recipe, you’ll have all the tools you need to create something truly delectable. Enjoy the process and share your flaky masterpieces with friends! Happy baking!
Print
Deliciously Flaky Cheese Danish
- Prep Time: 15 minutes
- Cook Time: 25 minutes
- Total Time: 40 minutes
- Yield: 4 servings
- Category: Dessert
- Method: Baking
- Cuisine: American
- Diet: Vegetarian
Description
A scrumptious Cheese Danish with flaky pastry and creamy cheese filling, perfect for breakfast or dessert.
Ingredients
- 1 sheet Puff Pastry (thawed)
- 1 cup Cream Cheese (softened)
- 1/4 cup Sugar
- 1 teaspoon Vanilla Extract
- 1 egg (beaten for egg wash)
Instructions
- Preheat your oven to 375°F (190°C).
- Roll out the thawed puff pastry on a lightly floured surface to about 1/8 inch thick.
- Cut the pastry into rectangular pieces, approximately 3×4 inches.
- Combine the softened cream cheese, sugar, and vanilla extract in a mixing bowl. Mix until smooth.
- Place a spoonful of the cream cheese mixture onto the center of each pastry rectangle.
- Fold the edges of the pastry over the filling, creating a pocket.
- Brush with beaten egg for that beautiful golden-brown finish.
- Bake for 20-25 minutes or until golden brown.
- Let them cool slightly before serving.
Notes
Best served warm. Dust with powdered sugar or serve with whipped cream for extra indulgence.